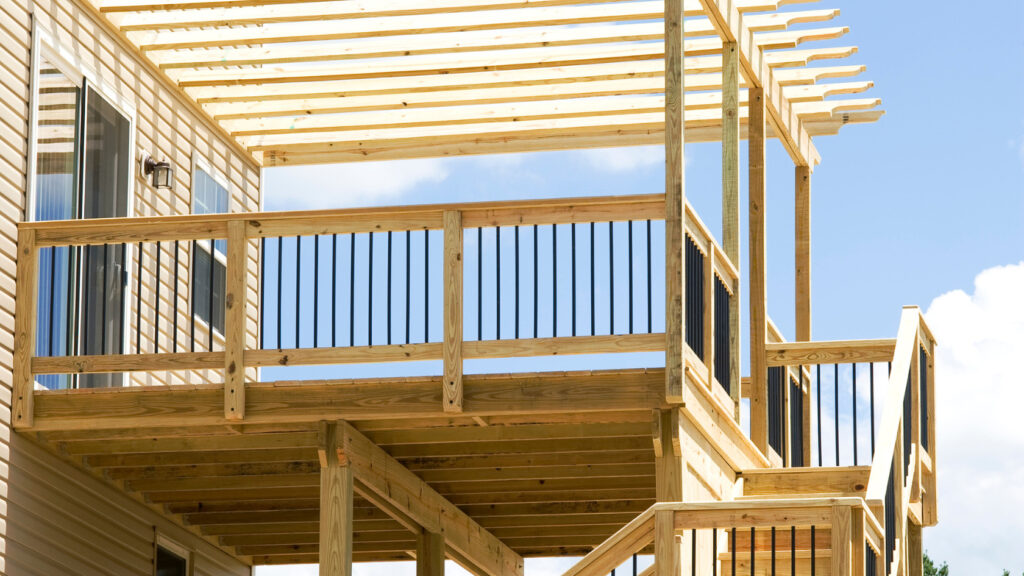
Welcome to our comprehensive guide on how to build a deck with a roof in New Zealand—a valuable project for any homeowner looking to enhance their outdoor living space. In this guide, we’ll walk you through every step of the process, from planning and design to the actual construction and finishing touches. Adding a roof to your deck not only increases your home’s value but also expands your living area, allowing you to enjoy the outdoors regardless of the weather. We’ll also discuss important considerations such as local building codes, choosing the right materials for New Zealand’s unique climate, and budgeting effectively for your project. Whether you’re a seasoned DIYer or a first-timer, this guide aims to equip you with all the knowledge you need to successfully complete your deck with a roof.
Building a deck with a roof in New Zealand can transform your outdoor space, providing shelter and enhancing your home’s value. To start, familiarize yourself with local building codes and obtain necessary permits. Select durable materials suited to NZ’s climate—like treated wood for the deck and polycarbonate for the roof. Prepare your site by leveling and marking the area. Build a strong foundation with posts and beams, lay the decking, then construct the roof, choosing a design that complements your home. Finish by weatherproofing and adding personal touches to make the space your own.
Table of Contents
Planning Your Deck With Roof
When considering adding a deck with a roof to your home, the planning stage is crucial to ensure that the final structure is both compliant with legal requirements and aesthetically pleasing. This guide will help you understand the steps needed to plan your deck meticulously.
Understanding Local Regulations
Before diving into the design and construction of your deck, it’s essential to familiarize yourself with the local building regulations in New Zealand. Building a deck with a roof often requires a building permit, as it is considered a significant structural addition to your home. Start by contacting your local council to inquire about the necessary permits and any specific requirements or restrictions. Compliance with the New Zealand Building Code is crucial not only for legal reasons but also for the safety and durability of your deck. These regulations ensure that the construction can withstand local environmental conditions, including wind, rain, and seismic activity.
Navigating through the council’s requirements might seem daunting, but it is a critical step. It ensures that your deck is built to last and is safe for everyone to enjoy. Additionally, adhering to these regulations can prevent potential legal issues or costly modifications in the future.
Design Considerations
Designing your deck requires thoughtful consideration of several key factors to ensure it complements your home’s existing architecture and meets your lifestyle needs. When planning the size of your deck, consider how you intend to use the space. Whether it’s for quiet morning coffees or large family gatherings, the size should accommodate your lifestyle comfortably without overwhelming your outdoor space.
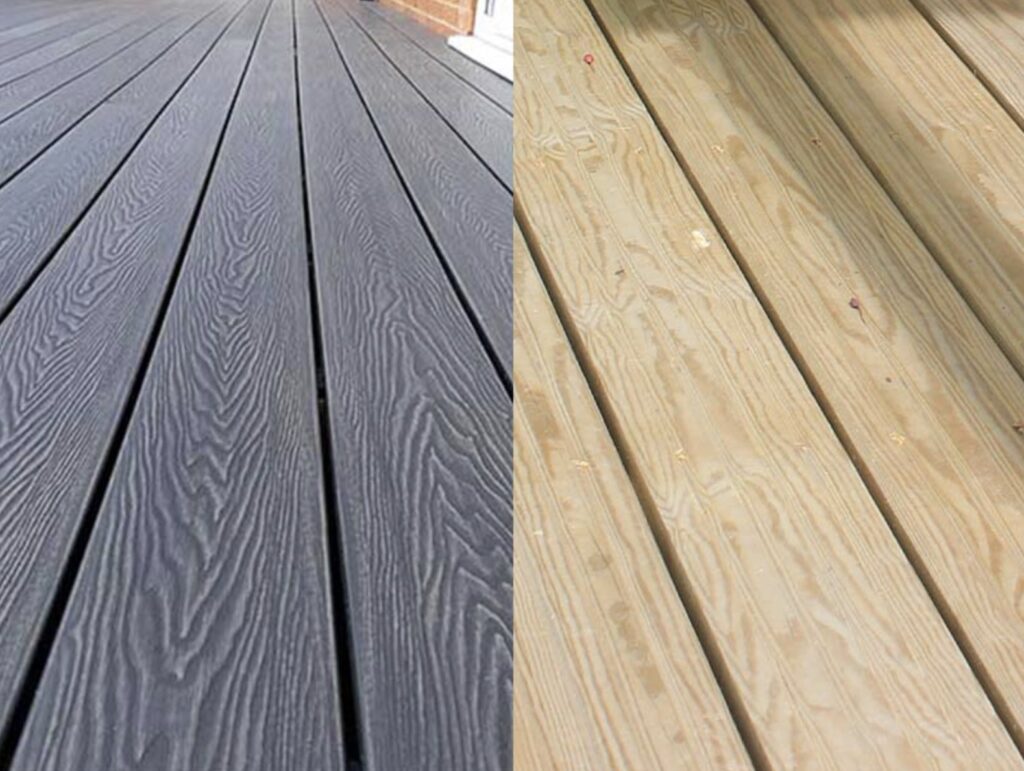
The choice of materials and style also plays a significant role in the construction of your deck. Common materials for deck building in New Zealand include timber, composite, and PVC, each offering different aesthetics and maintenance levels. Timber, for example, provides a classic look but requires regular maintenance, whereas composite materials are more durable and require less upkeep.
The architectural style of your house should guide the design of your deck. A well-designed deck should look like an extension of your home, not an afterthought. Therefore, consider the colours, textures, and styles of your existing home architecture when planning your deck. This integration helps create a seamless and attractive transition between your indoor and outdoor spaces.
Budgeting
Budgeting for your deck is another critical aspect of the planning process. The costs can vary widely depending on the size, materials, and complexity of the design. It’s important to set a realistic budget early in the planning phase and stick to it. Start by getting quotes from several contractors to gauge the potential costs. Be sure to include not only the cost of materials and labor but also any fees associated with permits or inspections.
To manage your budget effectively, prioritize the features that are most important to you and be willing to compromise where necessary. For instance, you might opt for a less expensive material that still meets your style and durability needs. Additionally, consider the long-term maintenance costs associated with your chosen materials, as this could affect your overall budget.
By taking a detailed and structured approach to planning your deck with a roof, you can ensure that the project meets all necessary regulations, fits well with your home, and stays within your budget. This careful planning will result in a new outdoor space that enhances the enjoyment and value of your home.
Choosing The Right Materials
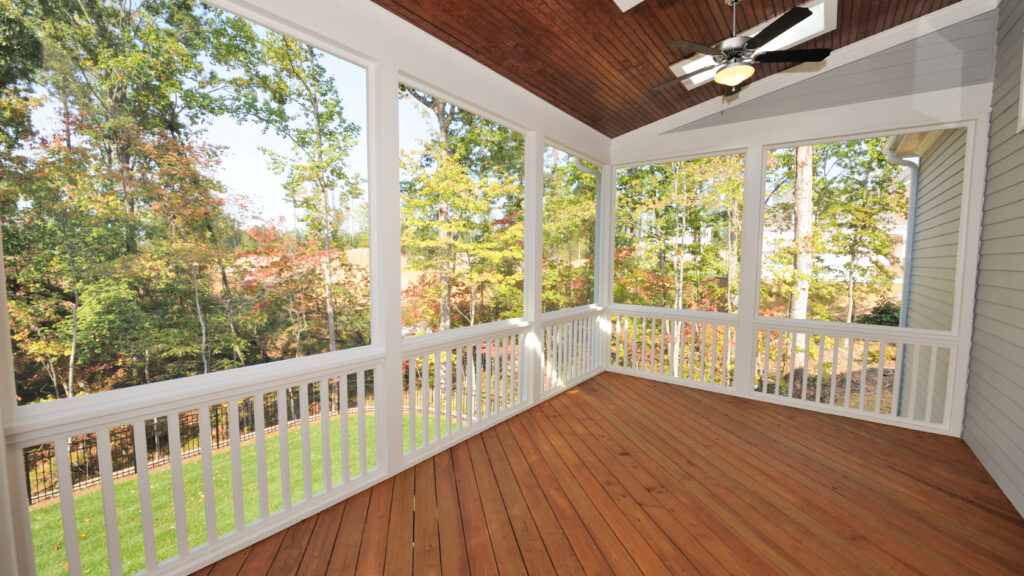
When embarking on a building project, whether it’s constructing a new deck, adding a roof, or undertaking a full renovation, selecting the right materials is critical. The materials you choose will not only determine the project’s overall aesthetic but also its durability and suitability to your local environment. In New Zealand, where the climate can vary from heavy rainfall in the Fiordland to the dry, windy conditions in Canterbury, choosing materials that can withstand local weather is essential. Below, we delve into the best choices for decking and roofing materials and outline the essential tools and equipment needed for your building projects.
Decking Materials: Wood vs. Composite
- Wood Decking: Wood is a popular choice for decking due to its natural appearance and warmth underfoot. In New Zealand, pine and hardwoods are the most common wood types used for decking. Pine is a cost-effective option and is widely available; however, it requires regular maintenance such as staining and sealing to prevent weather damage. Hardwood, such as kwila or jarrah, offers greater durability and a richer color but comes at a higher cost. Both types of wood need to be treated to withstand New Zealand’s harsh UV rays and frequent rainfalls.
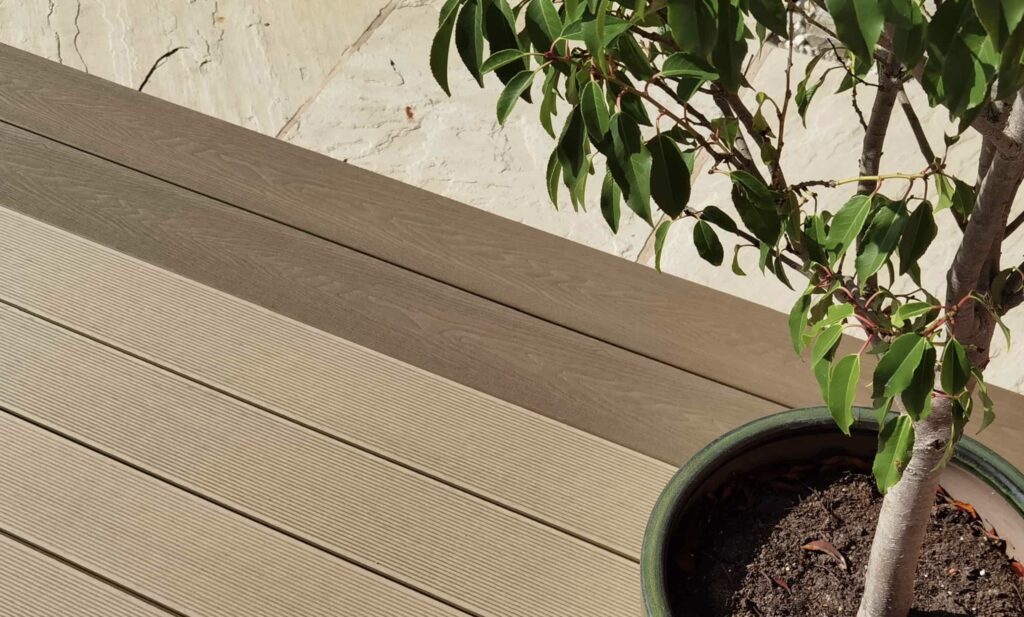
- Composite Decking: As an alternative to traditional wood, composite decking made from wood fibers and recycled plastics is gaining popularity. This material offers significant advantages in terms of durability and maintenance. Composite decks are resistant to rot, warping, and splintering, which are common issues in New Zealand’s variable climate. They also come in a variety of colors and textures that mimic natural wood. Although composite decking is more expensive upfront, the minimal maintenance requirements can make it a more cost-effective option over time.
Choosing the right type of decking will depend on your personal preferences, budget, and how much maintenance you are willing to undertake.
Roofing Materials: Ensuring Durability and Weather Resistance
- Polycarbonate Roofing: This lightweight and versatile material is ideal for areas that experience a lot of sun. Polycarbonate is UV resistant and can help keep spaces like sunrooms and greenhouses cooler, which is a significant advantage during New Zealand’s sunny summers.
- Metal Roofing: Known for its durability and longevity, metal roofing is an excellent choice for almost any New Zealand climate. It withstands high winds, is fire-resistant, and offers effective water shedding, making it ideal for rainy regions. Metal roofs are also available in a variety of styles and colors, allowing for flexibility in design.
- Shingles: Asphalt shingles are another popular roofing material, especially in residential construction. They provide a traditional look and offer sound dampening, which can be beneficial in high-traffic areas. Shingles are generally less expensive than metal roofing but will require more maintenance and are less durable over the long term.
Tools and Equipment Needed
For decking and roofing projects, having the right tools and equipment is just as important as selecting the right materials. Here is a list of essential tools that will help you get the job done efficiently and safely:
- Measuring Tape and Level: Precision is key in building, so a reliable measuring tape and a level are indispensable.
- Circular Saw: A circular saw is necessary for cutting wood or composite materials to size.
- Drill and Screwdriver Set: These tools are essential for assembling decks and securing roofing materials.
- Hammer and Nails/Screws: Depending on the materials used, you might need either nails or screws, along with a sturdy hammer.
- Safety Gear: Never overlook safety; ensure you have gloves, goggles, and appropriate footwear.
By choosing the right materials and equipping yourself with the proper tools, you can ensure that your building projects are both beautiful and built to last, regardless of the New Zealand climate. Take the time to assess each option’s pros and cons, and consider how they will fit with the specific requirements of your site and the local weather patterns.
Preparing The Site
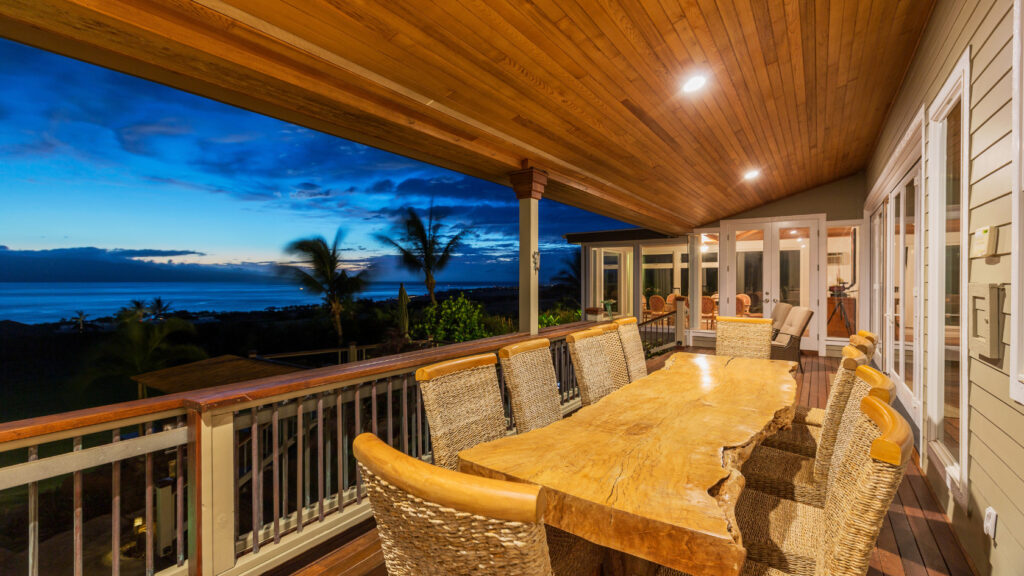
Preparing the site is a critical first step in ensuring the success of any construction or renovation project. Whether you’re laying down a new foundation, setting up a garden, or planning a home extension, the precision with which you prepare your site will significantly influence the overall outcome of your project. Here’s a detailed guide on how to effectively assess, level, clear, measure, and mark your site.
Site Assessment: Ensuring a Solid Start
Site assessment involves a thorough inspection and preparation of the area where the project will take place. This step is crucial to identify potential challenges that may arise during construction and to mitigate them beforehand.
1. Inspect the Area: Begin by walking through the site to visually inspect the ground conditions. Look for signs of uneven ground, potential water logging areas, or any debris that might obstruct the work. It’s essential to address these issues early to prevent complications later.
2. Clearing the Site: After inspection, clear the area of any rocks, sticks, rubbish, and other debris. If there are larger obstacles like boulders or old foundations, consider hiring professional help to remove them safely.
3. Leveling the Ground: Leveling is key to preventing structural issues. Use tools like a transit or laser level to check the flatness of the area. For small projects, a standard carpenter’s level can suffice. If significant slopes are detected, you may need to bring in soil to fill in low areas or remove soil from higher sections. The goal is to create a stable, flat surface that will support your project securely.
Measuring and Marking: Precision is Key
Measuring and marking are your next steps, ensuring that every aspect of the construction aligns correctly with the project plans.
1. Tools Needed: Gather all necessary tools for measuring and marking, which typically include a tape measure, string line, marking paint, and stakes. These tools will help you define the exact dimensions of your project area.
2. Taking Measurements: Start by referring to your project plans. Measure the specified dimensions on the ground, double-checking each measurement to ensure accuracy. It’s advisable to measure twice to avoid any costly mistakes.
3. Marking the Area: Using the measurements you’ve taken, mark the boundaries of your project area with stakes at each corner. Connect the stakes with a string line to visualize the layout. For clarity and permanent reference, use marking paint to draw lines along the string. This step is crucial as it delineates the area where the construction or gardening will take place, helping to guide the subsequent steps of your project.
4. Final Checks: Once the area is marked, take a final walk around to ensure everything is set up as per the project dimensions. This is your last chance to make adjustments before the actual work begins.
Taking the time to thoroughly prepare your site with careful assessment, clearing, leveling, measuring, and marking will pave the way for a smoother and more efficient project execution. Each step, from clearing debris to marking out precise measurements, builds the foundation for a successful outcome. Remember, the effort you put in during this initial phase can significantly impact the quality and durability of your final construction.
Building The Deck
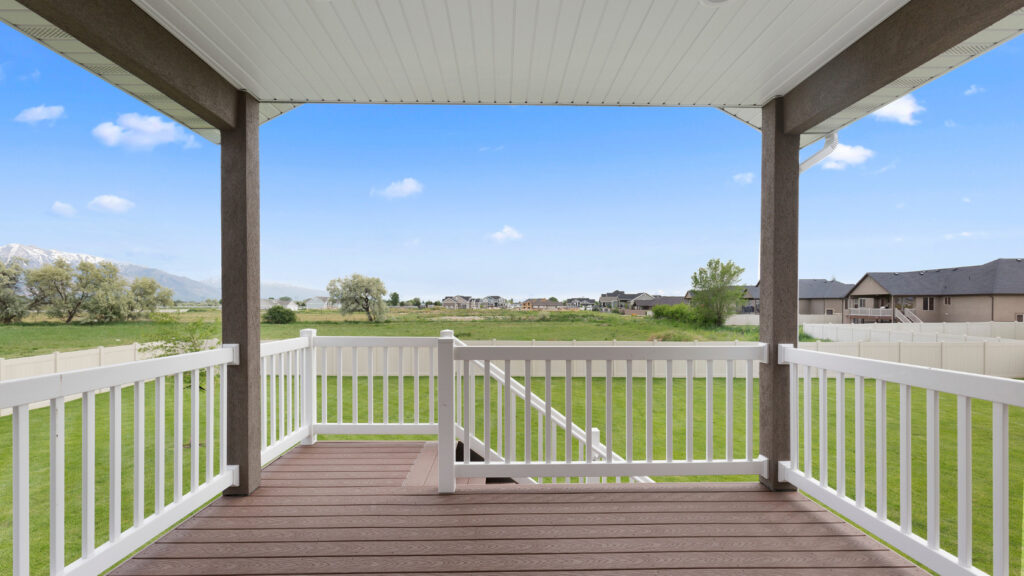
Creating a sturdy and aesthetically pleasing deck requires attention to detail, especially during the foundation and framing stage, followed by careful laying of the decking boards. This guide walks you through each critical step, ensuring your deck is not only beautiful but safe and durable.
Foundation and Framing: Laying the Groundwork
The foundation is the bedrock of any deck, and getting this right sets the tone for the entire structure’s stability and longevity. Start by choosing the right location, ideally a flat area or one that can be easily leveled. If you’re building on a slope, additional steps to ensure stability, such as the use of retaining walls or additional footings, might be necessary.
Step 1: Marking Your Territory
Use string lines and stakes to outline your deck’s footprint. This visual guide will help ensure that your deck is positioned as planned, preventing any layout mistakes.
Step 2: Digging Holes and Setting Posts
Depending on your local climate and building codes, holes for the posts should be dug below the frost line to prevent shifting during freeze-thaw cycles. Place the posts in the holes, then pour concrete around them, ensuring they are level and securely anchored.
Step 3: Attaching Beams to Posts
Once the concrete has set, attach horizontal beams to the posts using appropriate hardware. These beams will support the decking boards and need to be perfectly level and securely fastened to prevent any sagging or movement.
Laying the Decking: Precision and Patience
With the frame in place, the next step is laying the decking boards. The choice of material can vary from classic woods like cedar and redwood to modern composites, each offering different aesthetics and maintenance levels.
Step 1: Board Selection and Preparation
Select boards that are straight and free from major knots or flaws. Depending on your chosen material, treat or seal the boards as recommended to prevent future weather damage or staining.
Step 2: Board Layout
Begin at one end of the deck and lay your boards perpendicular to the beams. Use spacers to maintain uniform gaps between the boards, which will allow for drainage and wood expansion with temperature changes.
Step 3: Securing the Boards
Secure each board with decking screws, pre-drilling holes to prevent wood splitting. Ensure each board is securely fastened to each underlying beam to add strength and prevent any movement.
Safety Tips: Building Safely and Efficiently
Throughout the deck-building process, prioritizing safety is crucial. Wear appropriate personal protective equipment, such as safety goggles, gloves, and ear protection, especially when cutting wood or pouring concrete.
Stay Organized
Keep your workspace tidy and free from potential hazards like scattered tools and building materials, which can pose tripping risks.
Use Quality Tools
Invest in or rent high-quality tools for accurate cuts and secure installations. Dull blades or inadequate tools can not only compromise the build quality but also increase the risk of accidents.
Regular Inspections
Regularly check your tools and equipment for signs of wear or damage, and ensure all fittings and fastenings are tight and secure to prevent any structural failures.
By following this detailed guide for building your deck, from foundation to finishing, you’ll create a space that is not only functional and beautiful but also a safe addition to your home. This methodical approach helps prevent common mistakes and ensures your deck will be enjoyed for years to come.
Constructing The Roof
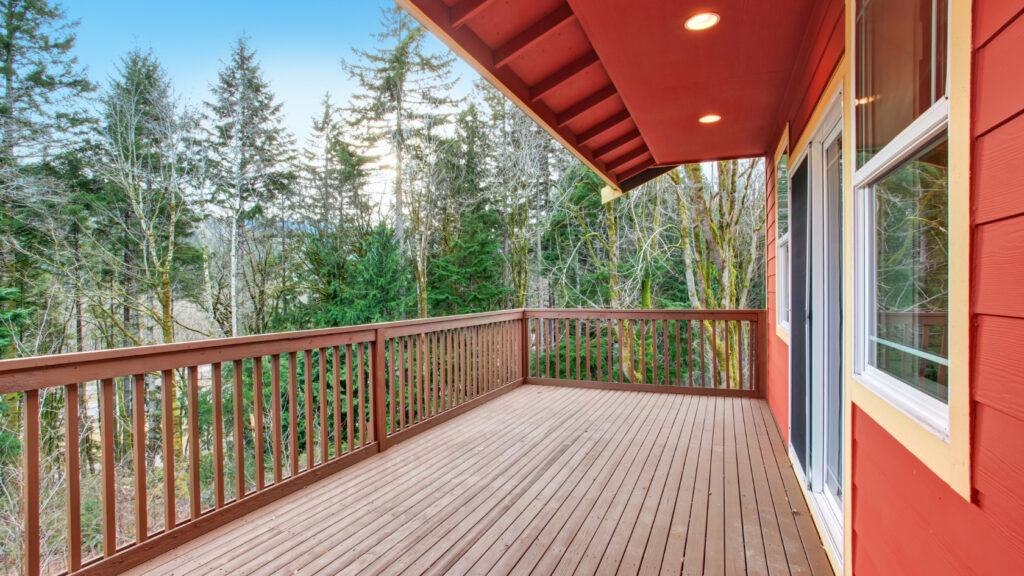
When constructing a roof over your deck, not only do you enhance the aesthetic appeal of your outdoor space, but you also increase its functionality by providing protection from the elements. This guide will walk you through the essential steps of choosing the right roof design, building sturdy structural supports, and installing roofing materials effectively. Whether you’re a seasoned DIY enthusiast or a homeowner seeking to understand the process, these insights will help you achieve a well-constructed deck roof.
Roof Design: Choosing the Best Style for Your Deck
Selecting the appropriate roof design is crucial as it affects not only the look of your deck but also its resilience and functionality. Here are some popular roof designs suitable for decks:
1. Gable Roof: This is one of the most common roof styles, characterized by its triangular shape. It effectively sheds water and snow, making it ideal for regions with heavy rainfall and snowfall. A gable roof also allows for better ventilation and more headroom under the roof.
2. Flat Roof: Although termed “flat,” these roofs usually have a slight pitch to allow water runoff. Flat roofs are modern and relatively easy to construct. They are particularly suitable for attaching solar panels and can be used as a garden or additional outdoor living space in urban areas.
3. Hip Roof: Similar to the gable roof but with slopes on all four sides that come together at the top. Hip roofs are more stable than gable roofs and offer excellent resistance against high winds, making them perfect for windy locales.
4. Shed Roof: Also known as a lean-to or slant roof, this is a single, sloping roof surface, typically attached to a taller wall. Shed roofs are simple to construct and are great for smaller decks.
Each roof type has its unique aesthetic and functional benefits. Your choice should consider the climate of your area, the existing architectural style of your home, and your personal preferences.
Structural Support: Building Rafters and Beams
The longevity of your deck roof depends significantly on the strength and quality of the underlying structural supports. Here are the basic steps to ensure robust support for your roof:
- Plan and Measure: Determine the load requirements based on your roof size and local building codes. Plan the spacing and dimensions of your rafters and beams accordingly.
- Selecting Materials: Use pressure-treated lumber or other durable materials suitable for outdoor use. The material should be capable of supporting the roof load and withstanding local weather conditions.
- Constructing Beams: Beams provide the main support for the rafters and are typically installed parallel to the ridge line of the roof. Ensure beams are securely anchored to the deck frame and that they are level and uniformly spaced.
- Installing Rafters: Rafters are placed perpendicular to the beams. They should be evenly spaced and securely fastened to both the beams and the ridge board at the top. For additional stability, consider using collar ties or rafter ties.
Installing the Roofing Material
Choosing the right roofing material and proper installation are crucial for ensuring that your deck roof is durable and weather-resistant. Here’s how to go about it:
1. Selecting Roofing Material: Options include asphalt shingles, metal roofing, rubber roofing, or even transparent polycarbonate for those who desire natural light on their deck. Each material has its pros and cons related to durability, cost, installation ease, and maintenance requirements.
2. Preparation: Before installing the new roofing material, make sure the deck surface is clean, dry, and free of any debris. Install an underlayment if required by your roofing material choice.
3. Installation: Follow the manufacturer’s instructions for your specific roofing material. Generally, start from the lower edge of the roof and work your way up, overlapping materials as you go to prevent water ingress.
4. Finishing Touches: Seal any joints, and edges, and install gutters if necessary. Ensure all flashing is properly placed around chimneys, pipes, and other protrusions.
Constructing a roof over your deck requires careful planning and execution but can significantly enhance the usability and value of your outdoor space. By selecting the appropriate design and materials and building a sturdy structure, you can enjoy a beautiful and functional deck roof for years to come.
Finishing Touches
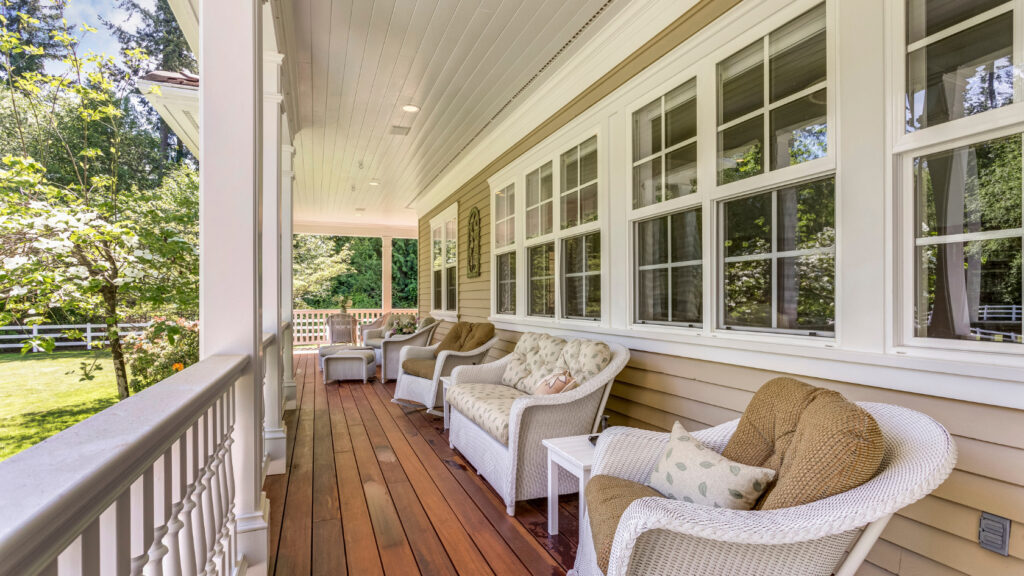
When you’re nearing the end of your deck and roof project, it’s crucial to focus on the finishing touches that will define the longevity, functionality, and style of your new outdoor space. In this section, we’ll cover essential tips for weatherproofing, ideas for decor and furnishing, and guidance on maintaining your deck and roof to ensure they remain in peak condition for years to come.
Weatherproofing Your Deck and Roof
Weatherproofing is arguably one of the most critical steps in the completion of your deck and roofing project. Proper sealing and weatherproofing not only protect your investment from the elements but also prevent costly repairs down the line. Here are some actionable tips:
1. Choose the Right Sealant: Select a sealant specifically designed for outdoor use and compatible with the material of your deck and roof. For wooden decks, a water-resistant sealant can help prevent rot and warping.
2. Regular Application: Apply sealant promptly after installation and plan for reapplication every few years, depending on your climate and the product specifications.
3. Attention to Detail: Make sure to cover all nooks and crannies where moisture might seep in. This includes the edges and the junctions where the deck meets the house.
Taking the time to apply sealant correctly can drastically extend the life of your deck and roof, ensuring they stand the test of time and weather.
Decor and Furnishing Your New Deck Space
Transforming your deck into a vibrant and cozy extension of your home involves thoughtful decoration and furnishing. Here’s how you can maximize both the usability and aesthetic appeal of your deck:
1. Functional Furniture: Opt for outdoor furniture that offers comfort and durability. Consider the size of your space and choose pieces that allow for movement and flow.
2. Lighting: Incorporate outdoor lighting to enhance the ambiance and ensure the space is enjoyable both day and night. Solar-powered lights are a sustainable and easy-to-install option.
3. Personal Touches: Add soft furnishings like outdoor rugs and cushions in weather-resistant fabrics. Potted plants can also bring life and color to your deck.
Creating a welcoming atmosphere will make your deck a favorite spot for relaxation and entertainment.
Maintaining Your Deck and Roof
Regular maintenance is essential to keep your deck and roof looking new and to prolong their lifespan. Here are some maintenance tips to keep in mind:
1. Routine Cleaning: Sweep your deck regularly to remove debris and dirt. For a deeper clean, use a specialized deck cleaner that suits the material of your deck.
2. Inspect Regularly: Check for signs of wear and tear, such as loose boards or damaged shingles on the roof. Early detection of problems can save on future repair costs.
3. Protect from Furniture Scratches: Use furniture pads under your outdoor chairs and tables to prevent scratches and preserve the finish of your deck.
By adhering to these maintenance practices, you can help ensure that your deck and roof remain functional and beautiful for many gatherings to come.
The finishing touches on your deck and roof are not just about aesthetics but are crucial for ensuring the durability and functionality of your outdoor living space. By implementing robust weatherproofing, choosing the right decor, and maintaining the area regularly, you will enhance your home’s exterior and enjoy your new deck and roof for many years.

Legal Considerations And Insurance
When adding a new deck to your home, it’s crucial to navigate the legal and insurance aspects carefully to ensure that your new addition is not only beautiful and functional but also compliant and properly covered. This section delves into the necessary inspections and approvals your deck needs, as well as the insurance updates that will protect your investment.
Inspections and Approvals: Ensuring Compliance with Local Regulations
Before you begin construction on your new deck, understanding and adhering to local building codes and obtaining the necessary approvals is essential. These regulations are in place to ensure safety and compliance with zoning laws, and failure to comply can result in fines or required modifications to your project.
1. Research Local Building Codes: Start by contacting your local building department. They can provide you with the specific requirements for deck construction in your area, including size limitations, railing height requirements, and materials that can be used. This step is crucial as it informs the design and materials you choose, ensuring that the deck not only meets your needs but is also up to code.
2. Permit Application: In most localities, adding a deck to your home requires a building permit. The permit process may involve submitting detailed plans and specifications for your deck, which will likely need to be prepared by a professional. The cost of the permit can vary significantly depending on your location and the size and complexity of the deck design.
3. Inspections: Once your permit is approved and construction is underway, your local building authority will require one or more inspections to ensure that the construction matches the approved plans and adheres to local codes. It’s typical to have an inspection post-footing installation and a final inspection upon completion. Adhering to this process not only ensures safety but also smooths the path for future renovations or the potential sale of your home.
Insurance: Protecting Your Investment
Updating your home insurance to include your new deck is just as important as the legal steps. Here’s how you can ensure your deck is properly covered:
1. Contact Your Insurance Provider: Before construction begins, it’s wise to contact your home insurance provider to discuss how building a deck will affect your coverage and premiums. This is crucial because any significant addition to your home, like a deck, increases its replacement value and potentially your liability risk.
2. Adjust Your Coverage: Your insurance provider may recommend increasing your coverage limits to account for the added value of the deck. In some cases, additional liability coverage may also be suggested if the deck includes features like built-in seating or a fire pit, which can increase the risk of injury and, consequently, potential liability claims.
3. Document Everything: Keep detailed records and receipts of all materials used and the work completed, including photographs before and after the deck is built. This documentation will be invaluable in case of damage due to weather, accidents, or other covered losses. It helps ensure that your claim is processed smoothly and accurately reflects the value of the added structure.
By following these guidelines, you can enjoy your new deck with the peace of mind that comes from knowing it complies with local regulations and is adequately insured against potential risks. Taking these steps protects not only your property but also your financial investment, ensuring that your deck can be a source of enjoyment for years to come.

FAQs: About How To Build A Deck With Roof NZ
Do I need a permit to build a deck with a roof in New Zealand?
Yes, most councils in New Zealand require you to obtain a building permit for decks that exceed a certain height or size, and this typically includes decks with roofs. Check with your local council to understand the specific requirements and obtain the necessary permits before starting your project.
What are the best materials to use for a deck with a roof in New Zealand?
For the decking, popular choices include treated pine, which is cost-effective and durable, and hardwoods like kwila, which are more resistant to weather and pests. For the roofing, materials such as polycarbonate are great for letting in light while providing protection from the rain, and colorsteel roofing is ideal for durability.
How much does it typically cost to build a deck with a roof?
The cost can vary widely depending on the size of the deck, the materials used, and whether you hire professionals or do it yourself. Typically, costs can range from $200 per square meter for basic materials to over $700 per square meter for high-end materials and professional installation.
How do I ensure my deck with a roof is structurally sound?
It’s important to use the right materials and adhere to local building codes. Foundation is key; ensure your posts are properly anchored into the ground and that beams and joists are securely attached. Hiring a structural engineer or consulting with a professional can also help ensure your deck is safe and durable.
Can I build a deck with a roof by myself?
Building a deck with a roof can be a complex project that might require advanced carpentry skills, especially for the roof structure. If you have experience in building projects and the right tools, you might manage it yourself. However, for safety and quality, consider hiring professionals, especially for the roofing.
What type of roofing is best for a deck in New Zealand’s climate?
Materials like polycarbonate are great for areas with variable weather as they are durable and can handle both sun exposure and rain. Metal roofing, such as colorsteel, is also excellent for its durability and ability to withstand heavy rains and winds.
How long does it take to build a deck with a roof?
The timeframe can vary based on the complexity and size of the deck, as well as whether you are doing it yourself or hiring professionals. Typically, the construction can take anywhere from a few days to several weeks.
How do I maintain my deck with a roof?
Regular maintenance includes cleaning the deck surface to prevent mildew and decay, checking and securing all fasteners, and ensuring the roofing material remains intact. Additionally, treat wood surfaces with a water-repellent finish to protect against moisture.
Are there any design considerations I should keep in mind when planning to build a deck with a roof?
Yes, consider the orientation of your deck for optimal sun and shade balance. Make sure the roof design complements your home’s existing architecture. Also, consider adding features like skylights or opening sections to the roof to enhance natural light.
What should I do if my deck with a roof needs repairs?
Inspect your deck and roof regularly to identify any potential issues early. For minor repairs, such as loose screws or small leaks, you can often fix these yourself. For more significant problems, such as structural issues or major leaks, it’s best to hire a professional.
Conclusion
In conclusion, taking the time to review the steps involved in your home improvement project is crucial. Reflect on how each phase contributes to enhancing the value and comfort of your home, and how it aligns with your lifestyle. Home improvement is not just about the immediate benefits, but also about the long-term enhancement of your living space. We encourage you to share your own stories and experiences in the comments below; your insights can provide valuable guidance to others considering similar projects. If you find yourself facing a particularly complex challenge, don’t hesitate to seek out professional help. Experts can offer the necessary skills and perspective to ensure your project’s success, saving you time and potentially costly mistakes.

