Welcome to our comprehensive guide on how to remove paint from your deck, a common challenge for many homeowners in New Zealand. Whether you’re dealing with accidental spills or looking to refresh your outdoor space with a new coat of paint, it’s crucial to use the right techniques and tools to ensure the job is done effectively without damaging your deck. In this article, we’ll explore various methods, from chemical strippers to sanding and using heat guns, tailored to the types of deck materials and paints typically found in NZ. Stay tuned as we walk you through each step of the paint removal process, offer troubleshooting tips for stubborn spots, and advise on post-removal care for a pristine finish.
To remove paint from a deck in New Zealand, start by choosing the right method based on the paint type and deck material. For oil-based paints, chemical strippers are effective, while sanding can be suitable for various paint types. Follow safety measures by wearing gloves, goggles, and a mask. Apply the chosen method—chemical stripper, sanding, or heat gun—and carefully remove the paint without damaging the wood. After paint removal, clean the deck thoroughly and apply a neutralizer if chemicals were used. Finish by restoring the deck with a suitable stain or sealer to protect and enhance its appearance.
Table of Contents
Understanding Your Deck
When embarking on a deck maintenance or renovation project, understanding the fundamental aspects of your deck’s construction and finishing can greatly influence the methods and products you choose for optimal results. This section delves into the common decking materials used in New Zealand and the types of paints that might cover them, providing essential knowledge for anyone preparing to refresh or restore their outdoor living space.
Types of Deck Materials
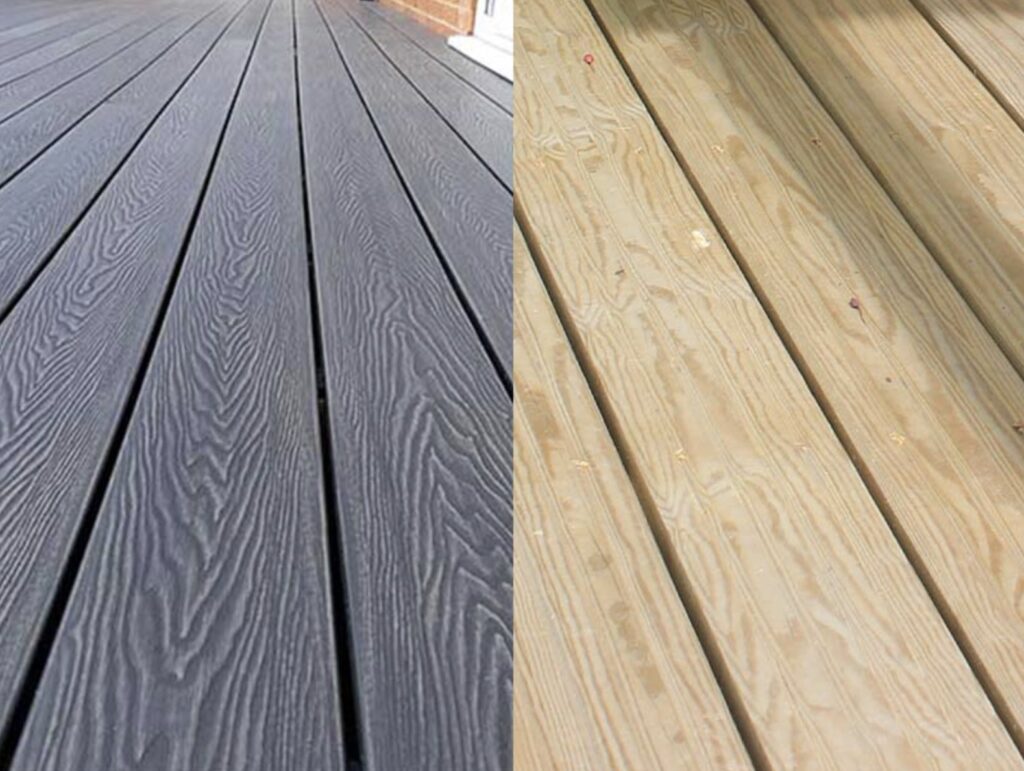
The choice of decking material can drastically affect both the appearance and longevity of your deck. In New Zealand, two popular materials stand out due to their durability and aesthetic appeal: pine and kwila.
- Pine: This softwood is a favorite among homeowners for its affordability and availability. Treated pine is especially common because of its resistance to rot and pests, making it a practical choice for many outdoor applications. However, pine’s softer nature means it can absorb paint and stains deeply, which might complicate removal efforts.
- Kwila: Known for its strength and durability, kwila is a hardwood that resists wear and weathering better than many other woods. Its rich, dark color offers a striking look, but this can also lead to challenges in paint removal, as the dense grain holds onto finishes more stubbornly than softer woods.
When considering paint removal from these materials, it’s crucial to understand how deeply the paint has penetrated the surface and the wood’s porosity. This knowledge will guide you in choosing the right techniques and products that will effectively strip the paint without damaging the wood.
Types of Paints Used on Decks
Decks in New Zealand are often treated with various types of paints and stains to enhance their appearance and protect them from the elements. The type of paint used can significantly affect the ease of removal:
- Oil-Based Paints: Known for their durability and resistance to wear, oil-based paints are a common choice for decks. They provide a robust layer of protection against moisture and UV rays but can be challenging to remove due to their strong adhesion and penetration into the wood.
- Latex Paints: Latex paints are water-based and generally easier to clean and remove than oil-based options. They dry faster and are less odorous, making them a popular choice for DIY projects. However, they may not be as resilient against harsh weather conditions, necessitating more frequent touch-ups.
Understanding the type of paint on your deck is crucial as it determines the strategies and solvents you’ll need for effective removal. For instance, oil-based paints often require stronger solvents and more rigorous scraping compared to the more forgiving latex paints.
Preparing for Paint Removal
Before you begin the process of stripping paint from your deck, a thorough assessment of the material and paint type is essential. This preparation ensures that you select the most effective products and methods, reducing the risk of damage to your deck and enhancing the efficiency of your project. Whether you’re dealing with a deeply embedded oil-based paint on kwila or a lighter latex coating on pine, your approach will vary significantly. Equip yourself with this knowledge to ensure your deck restoration project is successful, maintaining the beauty and integrity of your outdoor space.

Preparing For Paint Removal
When embarking on a paint removal project, thorough preparation is essential—not only to achieve a good finish but also to ensure the process is safe and environmentally responsible. Here’s a detailed guide on getting ready for paint removal, emphasizing safety measures and how to assess the scope of your project.
Safety First: Essential Gear and Environmental Considerations
1. Essential Safety Gear
Before you start scraping off that old paint, it’s crucial to gear up properly to protect yourself from potential hazards. Here’s what you’ll need:
- Gloves: Opt for chemical-resistant gloves, such as nitrile gloves, to protect your hands from harsh paint strippers and solvents.
- Goggles: Safety goggles are a must to prevent paint chips or chemical splashes from entering your eyes, especially when working with overhead surfaces.
- Masks: A good-quality respirator or mask is vital, particularly if you’re dealing with lead-based paints or using chemical strippers. Look for masks that can filter out toxic particles and fumes.
2. Environmental Precautions
Paint removal often involves harsh chemicals that can be harmful if they enter our water systems. To prevent environmental contamination:
- Use drop cloths and containment methods to catch paint debris and runoff.
- Avoid using hosepipes to clean surfaces, as this can lead to chemical-laden water entering storm drains.
- Choose eco-friendly strippers with lower volatile organic compounds (VOCs) when possible.
Assessing the Scope of Work: DIY or Professional Help?
1. Determining the Extent of Paint Removal
Understanding the scale of your paint removal project is key to planning and executing it efficiently. Here’s how to assess the task:
- Inspect the Area: Examine the surfaces you plan to work on and note the amount of paint that needs removing. Check for any signs of damage underneath old paint layers.
- Type of Paint: Determine what kind of paint was previously used (e.g., oil-based, latex). Different types may require specific removal techniques.
2. Deciding Whether to DIY or Call in a Professional
Once you have a clear picture of the project’s scope, decide if it’s something you can handle yourself or if you need to call in the pros.
- DIY: If the area is small and you’re comfortable with the required tools and safety measures, taking the DIY route can be a rewarding and cost-effective option.
- Professional Help: For large areas, complex situations (like lead paint), or if you lack the necessary equipment, hiring professionals is advisable. They have the expertise and tools to do the job safely and efficiently.
Preparing for paint removal is a critical first step that impacts the success and safety of your project. By adequately gearing up and assessing the scope of work, you can ensure that your paint removal goes smoothly, whether you choose to DIY or bring in a specialist. Remember, the key to effective and safe paint removal lies in careful preparation and the right choices.

Choosing Your Paint Removal Method
When embarking on a project to remove old paint from surfaces like decks, it’s crucial to select the right method for the task. Each method has its advantages and specific steps to ensure effective results without damaging your surfaces. Here, we explore three common paint removal techniques: using chemical strippers, sanding, and applying heat guns. By understanding each approach, you can make an informed decision that suits your project’s needs.
Chemical Strippers
Chemical strippers are a popular choice for removing paint due to their efficiency in breaking down the old layers. When selecting a chemical stripper, it’s essential to choose a product that aligns with your safety and environmental values.
Recommended Products Available in NZ
- Citristrip Paint and Varnish Stripping Gel: A non-toxic, biodegradable option favored for its effectiveness and mild citrus scent.
- Dumond Smart Strip Advanced Paint Remover: Ideal for more robust applications, this product is eco-friendly and effective on multiple paint layers.
- Peel Away 1 Heavy-Duty Paint Remover: Designed for the toughest jobs, it’s environmentally safe and can remove up to 30 layers in one application.
Step-by-Step Guide
1. Preparation: Ensure the area is well-ventilated. Wear protective gloves, goggles, and old clothes.
2. Application: Apply a generous layer of stripper with a brush. Follow the manufacturer’s instructions regarding the thickness.
3. Dwell Time: Allow the stripper to sit according to the product directions—usually between 30 minutes and 24 hours.
4. Removal: Once the paint bubbles, use a scraper to gently remove the paint. For stubborn areas, a second application may be necessary.
5. Cleanup: Wash the surface with water or a mild detergent to neutralize the chemical action.
Sanding
Sanding is a physically demanding method that can yield great results if done correctly. It’s particularly useful for smoothing out surfaces after paint has been stripped away.
Types of Sanders
- Manual Sanders: Ideal for smaller, intricate areas or where delicate precision is required.
- Power Sanders: Effective for larger areas, power sanders save time and effort. Orbital sanders are particularly good for deck paint removal because they are less likely to damage the wood.
Detailed Guide on Sanding Technique
1. Choose the Right Grit: Start with a coarser grit to remove the bulk of the paint and finish with a finer grit to smooth the surface.
2. Even Pressure: Apply consistent pressure and keep the sander moving to avoid gouging the wood.
3. Dust Removal: Regularly clear away dust to check your progress and prevent the buildup from clogging the sandpaper.
Heat Guns
Using a heat gun can be an effective method to remove paint, especially where chemicals are undesirable or sanding is impractical.
How to Safely Use a Heat Gun
1. Safety Gear: Wear heat-resistant gloves and eye protection.
2. Technique: Hold the heat gun at a distance that heats the paint until it bubbles but does not scorch the wood.
3. Scraping: Carefully scrape the softened paint away with a putty knife or scraper.
Advantages and Precautions
- Advantages: Heat guns are fast and effective, particularly for thick layers of paint.
- Precautions: There is a risk of fire and burns if not used carefully. Ensure you are working in a fire-safe area and keep a fire extinguisher handy.
By choosing the right paint removal method and following the correct procedures, you can revitalize an old deck or furniture, making them look new and well-maintained. Whether you opt for the thoroughness of chemical strippers, the control of sanding, or the speed of a heat gun, each method has unique benefits that, when applied correctly, can achieve professional-quality results.

The Removal Process
Removing old paint from wood surfaces can rejuvenate the appearance of your furniture or woodwork, but it requires careful handling to avoid damaging the underlying material. This section will guide you through the step-by-step process of paint removal, offering methods such as chemical stripping, sanding, and the use of heat. We’ll also address common problems you might encounter during the process and provide solutions to ensure a smooth and efficient project.
Subsection: Step-by-Step Paint Removal
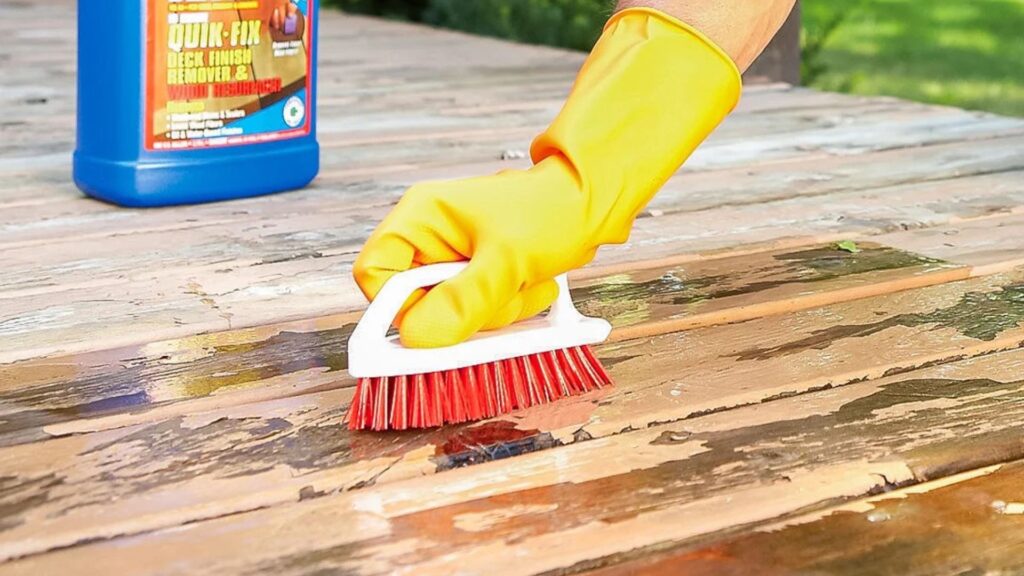
1. Chemical Paint Stripping
Chemical strippers are effective at breaking down the old paint on wood surfaces, making it easy to scrape away. Here’s how to do it:
- Choose the Right Stripper: Select a chemical stripper suitable for the type of paint you’re dealing with (e.g., water-based or oil-based).
- Apply the Stripper: Generously apply the chemical stripper using a brush, following the manufacturer’s instructions. Ensure you wear protective gear like gloves and goggles.
- Let It Sit: Allow the stripper to sit for the time specified on the product label, usually around 20-30 minutes.
- Scrape Off Paint: Using a plastic scraper, gently remove the bubbled paint. Be careful not to gouge the wood.
- Neutralize the Stripper: Follow the manufacturer’s instructions for cleaning the surface after stripping to neutralize any remaining chemicals.
2. Sanding
Sanding is a dustier method that requires manual labor but is highly effective for smaller projects or fine finishing.
- Choose Your Sandpaper: Start with a coarser grit to remove the bulk of the paint and finish with a finer grit to smooth the wood.
- Sand in the Direction of the Grain: To minimize scratches, always sand in the direction of the wood grain.
- Clean Up: Wipe down the surface with a damp cloth to remove all dust and debris after sanding.
3. Heat Guns
Using a heat gun can speed up the paint removal process by softening it before scraping.
- Select the Appropriate Temperature: Set the heat gun to a suitable temperature to avoid scorching the wood.
- Apply Heat Evenly: Move the heat gun over the surface evenly to soften the paint without overheating any area.
- Scrape Gently: Once the paint bubbles, scrape it off gently with a putty knife or scraper.
Tips for Effective Paint Stripping
- Always wear protective gear, including masks, to avoid inhaling fumes or dust.
- Work in a well-ventilated area to disperse fumes and dust.
- Test each method on a small, inconspicuous area of your project to ensure it does not damage the wood.
Subsection: Troubleshooting Common Problems
Dealing with Stubborn Paint Spots
Sometimes, despite your best efforts, some paint spots won’t budge.
- Reapply Stripper: For stubborn spots, a second application of chemical stripper can be more effective.
- Use a Detail Sander: A small, fine-grit detail sander can help remove paint from tough spots without damaging the wood.
Handling Wood Damage
It’s not uncommon to find that the wood has been damaged during the paint removal process.
- Fill Small Gaps and Cracks: Use wood filler to repair any small imperfections, ensuring it matches the color and type of your wood.
- Sanding for Uniformity: After filling, sand the area again to create a smooth, uniform surface ready for finishing.
By following these detailed steps and tips, you can efficiently remove old paint from wood surfaces while keeping the integrity of the wood intact. Whether you’re restoring an antique piece of furniture or updating the look of your woodwork, proper paint removal is key to achieving a professional-quality finish.

Post-Paint Removal
After successfully removing old paint from your deck, you might find yourself standing before a surface that feels like a blank canvas. The following steps will guide you through cleaning and neutralizing your deck, as well as restoring its aesthetic beauty with the right stains and sealers. Let’s delve into how to efficiently and effectively revitalize your deck, ensuring a result that not only looks good but lasts.
Cleaning and Neutralizing the Deck
Once the paint is stripped off your deck, cleaning it properly is critical to prepare it for the restoration process. Here’s how to do it right:
1. Sweep and Rinse: Start by sweeping the deck to remove any loose debris. Then, rinse the deck thoroughly with a hose or a pressure washer at a low setting. It’s crucial to remove all residues of paint and stripper to ensure a clean surface for further treatment.
2. Choose the Right Cleaner: Use a specialized deck cleaner that can tackle any remaining stains or residues. For decks that have undergone chemical paint stripping, choosing a cleaner that neutralizes the chemical stripper is essential. This step ensures that no stripping agent remains that could potentially damage the wood.
3. Apply Neutralizer: If you’ve used a chemical stripper, applying a neutralizer is a must. Products like oxalic acid or a specialized deck brightener help neutralize the pH level of the wood, making it safe for staining or sealing. This step is crucial to prevent future wood damage and to ensure the sealer adheres properly.
4. Scrub and Rinse Again: With a stiff brush, scrub the deck thoroughly after applying the cleaner or neutralizer. This helps remove embedded dirt and opens up the pores of the wood for better absorption of stains or sealers. Rinse the deck again thoroughly with clean water and allow it to dry completely.
Deck Restoration Tips
Restoring your deck is not just about making it look new; it’s about protecting it from the elements and extending its life. Here are tips to restore your deck’s appearance effectively:
1. Choosing the Right Stain or Sealer: Select a product based on the desired finish and the level of protection needed. For decks exposed to high UV rays and moisture, choose a stain with UV blockers and waterproofing properties.
2. Application: Apply the stain or sealer with a brush or roller. For best results, follow the product’s instructions on application methods, temperatures, and drying times. A consistent, even application ensures an attractive finish and optimal protection.
3. Recommendations for New Zealand: In New Zealand, look for high-quality products that can withstand the local climate. Brands like Mitre 10 offer a range of deck stains and sealers that cater to various needs and preferences. Their products are known for durability and effectiveness, ensuring your deck stays protected and looks great.
4. Regular Maintenance: Once restored, maintain your deck by cleaning it regularly and reapplying sealer as recommended. This prevents buildup of dirt and grime and reduces the frequency of deep cleanings and restorations.
By following these steps, you not only enhance the aesthetic appeal of your deck but also contribute to its longevity. Remember, the key to a successful deck restoration lies in meticulous preparation and the use of quality products. Whether you’re neutralizing after a chemical strip or selecting the best stain from Mitre 10, each step is crucial in achieving a beautiful and durable deck.

Maintaining Your Deck
Keeping your deck in prime condition not only enhances your outdoor living space but also prolongs the life of the material. Regular maintenance and preventative measures can save you from costly repairs down the line. Here’s a detailed guide on maintaining your deck with routine practices and strategies to avoid common pitfalls like paint spills.
Regular Maintenance Tips
Routine Practices to Keep the Deck in Good Condition
Regular maintenance is key to ensuring your deck stays beautiful and functional year-round. Start with a thorough cleaning at least twice a year—once in the spring and once in the fall. Use a deck cleaner suitable for your deck’s material (wood, composite, etc.) to remove dirt, mildew, and debris. A soft bristle brush can help scrub away stubborn grime without damaging the surface.
Inspect your deck for any signs of wear or damage such as loose boards, protruding nails, or rot. Tightening loose fixtures and replacing damaged boards will help maintain the integrity of your deck. Also, check for water damage or areas that remain damp, as these can lead to mold and mildew growth.
How Often to Repaint or Reseal the Deck
The frequency of repainting or resealing your deck depends on several factors, including the type of material used, the deck’s exposure to weather, and the quality of the previous paint or sealant job. Generally, wooden decks should be repainted or resealed every two to three years. However, if your deck is under constant exposure to harsh weather, you may need to do it more frequently. Always choose high-quality sealants and paints designed for exterior use and specifically suited for decking materials to ensure the best protection and aesthetic result.
Preventative Measures to Avoid Future Paint Spills
Tips on Avoiding Common Mistakes During Painting Projects
When it comes time to repaint your deck, taking the right preventative measures can keep the process smooth and mess-free. Here are some tips to help avoid common mistakes:
1. Prepare the Surface Properly: Before starting to paint, ensure your deck is clean and dry. This helps the paint adhere better and lasts longer. Sand any rough areas to create a smooth surface.
2. Use Painter’s Tape: Apply painter’s tape along edges where you don’t want paint. This includes siding, trim, and any nearby fixtures. It’s a simple step that helps ensure clean lines and keeps paint where it belongs.
3. Choose the Right Tools: Using the correct brushes or rollers can make a big difference. Rollers can cover large, flat areas more quickly, while brushes are perfect for detailed work around edges and corners.
4. Avoid Overloading the Brush or Roller: Dipping your brush or roller too deeply into the paint can lead to drips and spills. Instead, lightly load your tool with paint to maintain control over the application.
5. Keep a Damp Cloth Handy: If spills or drips happen, having a damp cloth nearby allows you to quickly wipe up excess paint before it dries, reducing cleanup time and preventing stains.
By following these maintenance tips and preventative strategies, you can keep your deck looking its best and avoid the common pitfalls that come with deck upkeep. Regular care not only enhances the beauty and functionality of your outdoor space but also protects your investment for years to come.

FAQs: About How To Remove Paint From Deck NZ
What are the best methods to remove paint from a deck in NZ?
The most effective methods for removing paint from a deck are using chemical strippers, sanding, or applying heat with a heat gun. The choice of method depends on the type of paint and the deck material.
How do I choose the right chemical stripper for my deck?
Select a chemical stripper that is compatible with both the deck material and the type of paint. For eco-friendly options or less harsh chemicals, look for products specifically marked as such, available at local NZ stores like Mitre 10.
Can I use a pressure washer to remove paint from my deck?
Using a pressure washer can be risky as it might damage the wood if not handled correctly. It’s recommended primarily for removing loose paint after most of the paint has been stripped using other methods.
What safety equipment do I need when removing paint from a deck?
Wear protective gloves, safety goggles, and a respirator mask to protect against chemical fumes and dust. Also, ensure the work area is well-ventilated.
How do I prepare my deck before applying paint remover?
Clean the deck thoroughly to remove dirt, debris, and old flaking paint. This preparation ensures the paint remover works more effectively.
What should I do if the chemical stripper doesn’t remove all the paint?
If some paint remains after using a chemical stripper, you can try a second application or switch to sanding or using a heat gun to remove the stubborn areas.
How long does it take to remove paint from a deck?
The time required can vary widely based on the size of the deck, the type of paint, and the removal method used. It can take anywhere from a few hours to a full day.
What are some tips for sanding a deck to remove paint?
Use a power sander for efficiency but be gentle to avoid gouging the wood. Start with coarse sandpaper and gradually move to finer grits for a smooth finish.
How should I dispose of the waste after removing paint from my deck?
Dispose of chemical waste and paint residues according to local council regulations in New Zealand to prevent environmental contamination.
Can I repaint my deck immediately after removing the old paint?
Before repainting, ensure the deck is completely clean, dry, and free of residues. You may also need to apply a primer or a sealer depending on the type of new paint and the deck material.
Conclusion
In concluding, it’s essential to revisit the core insights discussed. This recap helps solidify your understanding and ensures you’re well-prepared to apply the concepts effectively. Remember, tackling your project in manageable increments can significantly enhance your outcomes, making the process less daunting and more achievable. Your experiences and strategies are invaluable, so I encourage you to share them. Whether it’s through comments below, social media engagement, or direct discussions, your input helps foster a community of learning and growth. Furthermore, if you find yourself needing more specialized guidance, don’t hesitate to seek professional assistance. Taking this proactive approach not only accelerates your progress but also ensures you navigate any challenges with expert support.