Welcome to our comprehensive guide on how to strip stain from your deck, a crucial step in maintaining the beauty and longevity of your outdoor living space. Whether your deck has endured the harsh New Zealand sun, relentless rains, or simply aged over time, removing the old, faded stain can rejuvenate its appearance and prepare it for a fresh application. In this article, we’ll walk you through the necessary safety tips, outline the essential materials and tools you’ll need (highlighting some eco-friendly options available locally), and provide you with a detailed, step-by-step tutorial to efficiently strip your deck. By the end of this guide, you’ll be equipped with all the knowledge to tackle this project effectively, ensuring your deck remains a pristine and inviting extension of your home.
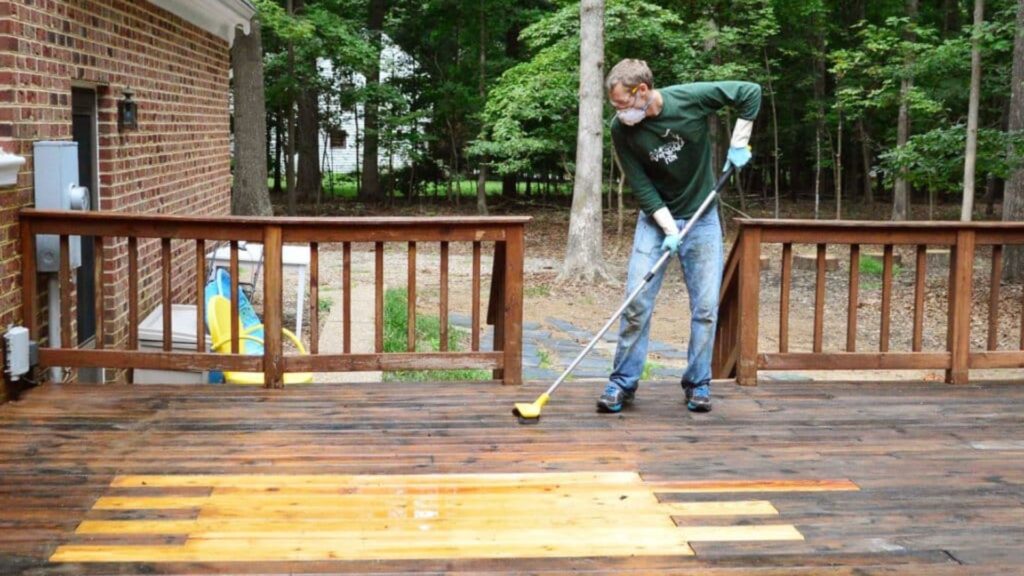
Stripping stain from a deck in New Zealand requires careful preparation and the right materials. Start by cleaning your deck thoroughly and gather all necessary tools including a quality deck cleaner, like those from Mitre 10. Apply a commercial or eco-friendly stain stripper evenly across the wood. Allow it to sit according to the manufacturer’s instructions before scrubbing with a stiff brush. Remove the old stain with a pressure washer or by hand scraping, taking care not to damage the wood. Finish by rinsing the deck and applying a neutralizer to prepare the wood for new stain or sealant. This process will help rejuvenate your deck and protect it against NZ’s diverse weather conditions.
Table of Contents
Preparing Your Deck For Staining
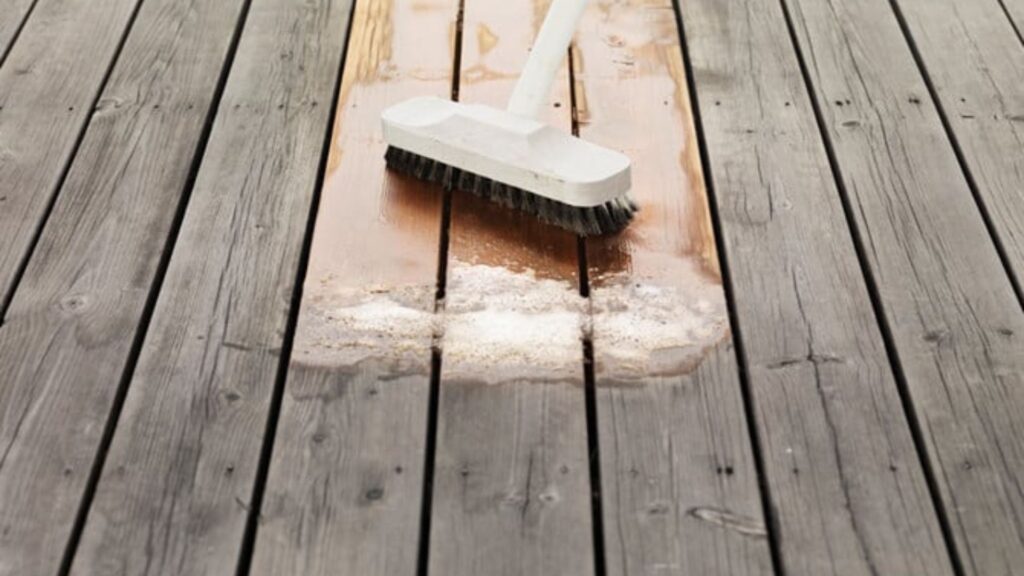
Before you dive into staining your deck, proper preparation is crucial to ensure the best results. This preparation not only enhances the effectiveness of the staining process but also extends the life of your deck. Here’s how you can thoroughly prepare your deck for a new coat of stain, ensuring it looks great and withstands the elements effectively.
Assessing Your Deck’s Condition
How to Inspect Your Deck for Damage
Start by thoroughly examining your deck for any signs of structural damage or wear. Look for loose boards, splinters, or any protruding nails that may need attention. It’s essential to address these issues before applying any stain to avoid further deterioration. Use a screwdriver to probe for wood rot, especially in areas that are often wet or shaded as these spots are more prone to decay.
Signs That Your Deck Needs a New Stain or Treatment
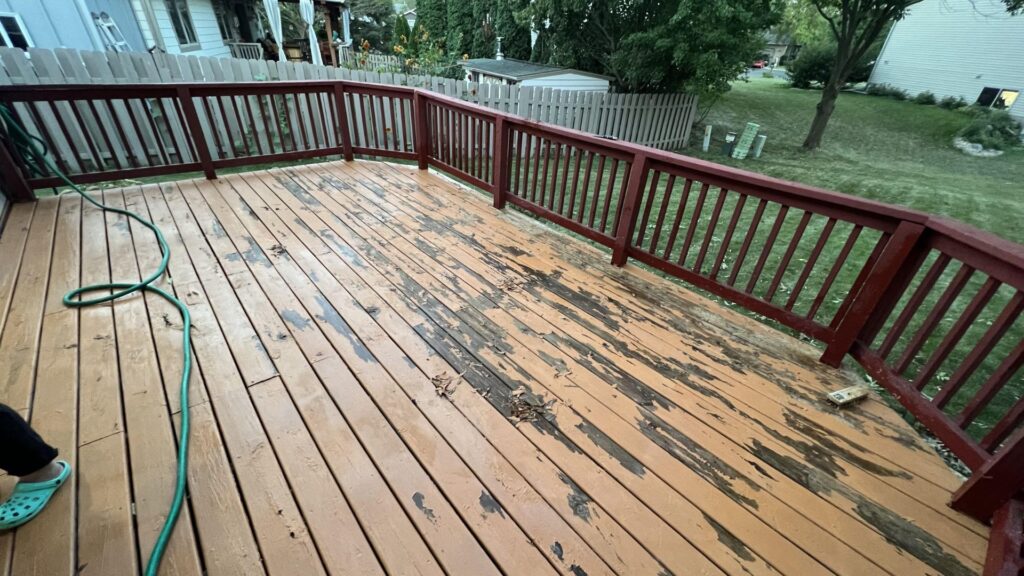
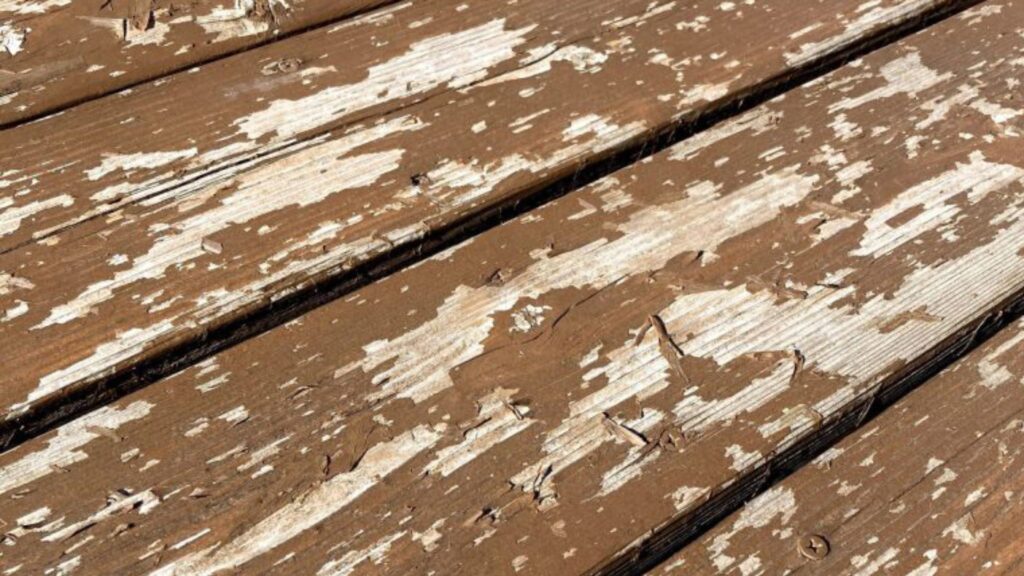
A visual inspection can reveal much about the state of your existing stain or sealant. If you notice the finish has faded, wood grains are showing through, or there are patches where the stain has peeled away, it’s time for a new coat. Also, perform a simple water test: sprinkle a few drops of water onto the wood; if the water beads up, your old sealant is still performing. However, if the water soaks in quickly, it means the wood is exposed and vulnerable, signaling that it’s time to re-stain.
Gathering Materials and Tools
List of Necessary Materials and Tools
For a successful staining project, gathering the right materials and tools is essential. You will need:
- Stain or sealant: Choose a product based on your climate and the type of wood of your deck.
- Cleaning solution: Prior to staining, a thorough cleaning is necessary. Mitre 10 deck cleaners are highly recommended for their effectiveness and range of options suited to different types of wood and stains.
- Brushes and rollers: For applying the stain.
- Sandpaper: To smooth any rough areas and edges.
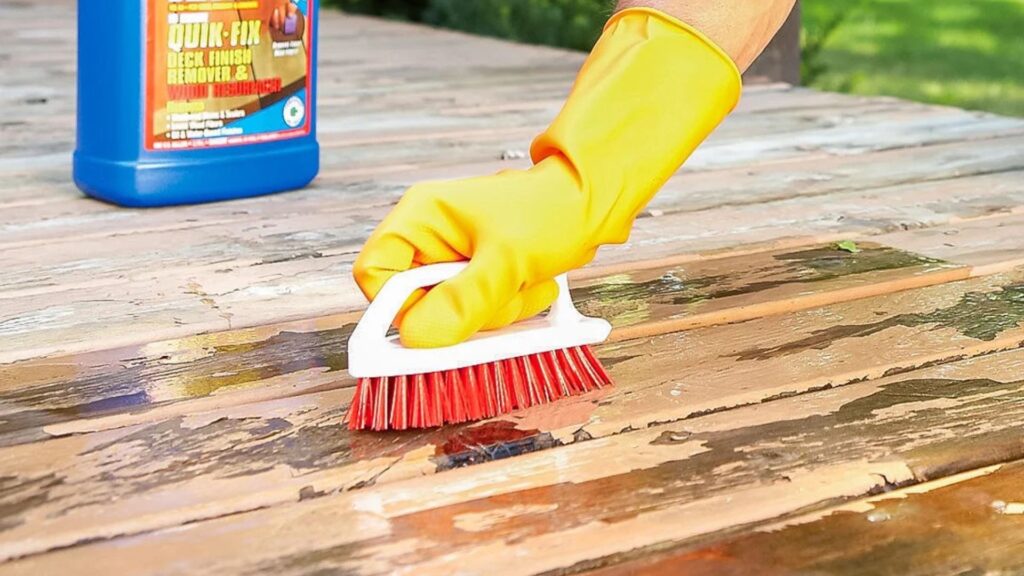
- Safety gear: Gloves, goggles, and masks for protection.
Suggestions for Eco-Friendly and Effective Products Found in New Zealand
Choosing eco-friendly products for your deck staining project is not only good for the environment but also for the longevity of your deck. Look for cleaners and stains that are free from harsh chemicals and are biodegradable. Many local brands in New Zealand offer sustainable solutions that are designed to protect your deck and the environment without compromising on quality.
Preparing your deck thoroughly before staining will ensure a smoother application, better adhesion of the stain, and a more durable finish. By following these steps and choosing the right products, like those from Mitre 10, you’re setting your deck up for years of enjoyment and protection. Always consider the environmental impact of your choices and opt for products that support sustainability.
Safety Measures Before Starting
When undertaking any construction or renovation work, safety should always be a top priority. This is especially true when engaging in activities that involve heavy materials or machinery, as is often the case with home improvement projects. Ensuring you have the proper safety measures in place before you begin can help prevent accidents and protect both you and your environment. Below, we’ll discuss the essential personal protective equipment (PPE) you’ll need and the environmental precautions that should be taken to safeguard your garden and surrounding areas.
Personal Protective Equipment (PPE) Needed for the Job
Before commencing any construction or DIY project, it is crucial to equip yourself with the appropriate personal protective equipment. PPE is your first line of defense against potential hazards that could cause injury. Here are the key pieces of PPE to consider:
1. Safety Glasses or Goggles: Protecting your eyes should be a priority as flying debris and dust are common in construction areas.
2. Gloves: Wear sturdy gloves to safeguard your hands from sharp objects, rough materials, and chemicals.
3. Hearing Protection: If your project involves loud machinery, such as drills or saws, earplugs or earmuffs are essential to protect your hearing.
4. Hard Hat: For projects that involve overhead risks, wearing a hard hat can protect you from falling objects.
5. Respiratory Protection: Dust masks or respirators are important if you’re working in an environment with dust, fumes, or airborne particles.
6. Protective Footwear: Steel-toed boots provide the best protection against heavy falling objects and sharp shrapnel.
Always ensure that the PPE you choose is compliant with the latest safety standards and fits properly to provide the intended protection.
Environmental Precautions to Protect Your Garden and Surrounding Area
Protecting your immediate environment is just as important as personal safety. Here’s how you can minimize damage to your garden and the surrounding areas during your project:
1. Cover Plants and Soil: Use tarps or plastic sheeting to cover nearby plants and exposed soil to protect them from spills, debris, or harmful substances.
2. Chemical Management: Store all chemicals, like paints and solvents, securely and away from garden areas. Ensure containers are sealed to prevent leaks.
3. Dust Reduction: Utilize water sprays or dust extractors when working to minimize the spread of dust and particles.
4. Waste Disposal: Collect all waste material and dispose of it responsibly. Keeping the site clean will reduce the risk of pollutants running off into the garden.
5. Machinery Use: When using heavy machinery, ensure it does not damage the landscape. Position machinery carefully and use planks or mats to distribute weight evenly.
Implementing these precautions can significantly reduce the risk of damaging your garden and helps ensure that your surroundings remain pristine.
By taking the time to properly prepare with the right personal protective equipment and environmental safeguards, you can ensure that your project is not only successful but also safe for everyone involved and the environment. This careful planning is essential for a smooth, accident-free process.
Step-By-Step Guide To Stripping Stain From Your Deck
Renovating your deck involves more than just applying a fresh coat of stain; it requires a thorough process to remove the old layers and prepare the surface for a new finish. Here’s a detailed guide to help you effectively strip the stain from your deck, ensuring optimal results that enhance the longevity and appearance of your outdoor living space.
Cleaning the Deck
- Preparation is Key: Before you can begin the process of stripping the stain, it’s crucial to clean the deck thoroughly. This step ensures that the stripping agents can work effectively without interference from dirt, debris, or mildew.
- Techniques and Products for Optimal Cleaning: Start by sweeping the deck to remove loose dirt and debris. Use a stiff brush to tackle any accumulated grime or moss. For cleaning, a deck cleaner specifically designed for pre-stain preparation is recommended. In New Zealand, products like Mitre 10 deck cleaners are highly effective, as they cater to local environmental conditions and wood types. Apply the cleaner according to the manufacturer’s instructions—usually, this involves diluting the cleaner in water, applying it to the deck, and letting it sit for a specified period before rinsing it off with a garden hose or pressure washer at low setting to avoid damaging the wood.
Applying the Stripper
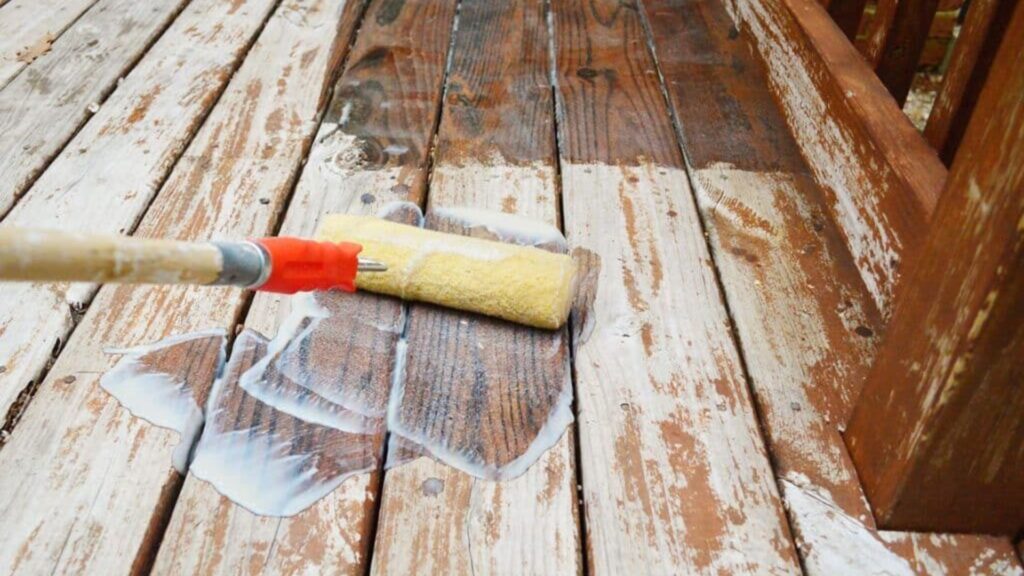
- Detailed Guide on How to Apply the Stain Stripper: With your deck cleaned, it’s time to apply the stripper. Choose a stain stripper that is appropriate for the type of stain and wood of your deck. Apply the stripper with a paint roller or a sprayer, ensuring even coverage. Work in sections so the stripper doesn’t dry out before you can scrub it.
- Tips for Effective Application and Common Mistakes to Avoid: Always wear protective gear, such as gloves and goggles, to avoid skin and eye irritation. Avoid applying the stripper in direct sunlight as this can cause it to evaporate too quickly. One common mistake is not allowing the stripper enough time to break down the stain—follow the recommended time on the product label. Be cautious not to over-apply the stripper as it can saturate the wood excessively and lead to damage.
Removing the Old Stain
- Techniques for Scraping and Washing Off the Old Stain: After the stripper has had time to work, use a scraper designed for decks to remove the softened stain. Be gentle to avoid gouging the wood. For stubborn areas, a second application of the stripper may be necessary. Once the majority of the old stain is removed, wash the deck again with a deck cleaner or a pressure washer at a low setting to remove any residual stripper and lifted stain.
- Handling Tough Stains and Advice on Multiple Applications: Some stains, especially those that are very old or deep-set, might require multiple stripping sessions. If you find the stain is not fully removed after the first attempt, it’s acceptable to reapply the stripper for a deeper clean. Always allow the wood to dry completely between applications to assess the progress.
Neutralizing the Wood
- Importance of Neutralizing the Wood After Stripping: Neutralizing the wood is a critical step that balances the pH level of your deck after using harsh chemical strippers. This step is essential to prevent the new stain or sealant from failing prematurely.
- Products and Methods Recommended for NZ Conditions: Use a wood brightener or a neutralizer that complements the stripper used. These products are readily available at local home improvement stores and are formulated to suit the specific needs of New Zealand’s predominantly temperate climate. Apply the neutralizer according to the manufacturer’s directions—typically involving spreading it over the deck, allowing it to sit for a short period, and then rinsing it off thoroughly with water.
By following these detailed steps, you can ensure that your deck is perfectly prepped for a new stain or sealant, providing a fresh and vibrant look that lasts. Remember, the key to a successful deck renovation lies in meticulous preparation and using products suited to your local environment and the specific needs of your deck’s material.
Aftercare And Maintenance
Maintaining your deck is essential to extend its lifespan and keep it looking its best. After you’ve stripped the old stain from your deck, proper aftercare and routine maintenance are crucial to protect your investment. Here’s a comprehensive guide on how to care for your deck post-stripping, how to handle re-staining and treating under New Zealand’s unique weather conditions, and advice on when to tackle maintenance yourself versus calling in professional help.
Tips for Maintaining the Deck After Stripping the Old Stain
Once you’ve successfully removed the old stain, your deck will need a bit of TLC to restore its beauty and prepare it for a new finish. Start by giving your deck a thorough cleaning. Use a deck cleaner that suits the type of wood and the condition it’s in. Products like those from Mitre 10 offer formulations that can help cleanse the wood effectively while prepping it for staining.
After cleaning, allow the deck to dry completely, which typically takes about 48 hours. Once dry, inspect the deck for any loose nails or screws, and sand down any rough spots to create a smooth surface. These steps are vital for ensuring that the new stain or sealant adheres properly and lasts longer.
How Often to Re-stain or Treat Your Deck in NZ Weather Conditions
New Zealand’s weather can be harsh on wooden structures, with conditions ranging from intense UV exposure to damp, rainy weather. To keep your deck in top condition, it’s recommended to re-stain or treat your deck every 12 to 24 months. However, this can vary depending on the exposure to elements and the type of product used. A good rule of thumb is to check the deck’s finish annually. Look for signs of wear such as fading or peeling, and test the wood’s moisture resistance by sprinkling water on the deck’s surface—if the water beads, the seal is still effective; if it soaks in, it’s time to reapply a protective coat.
DIY vs. Professional Deck Maintenance: When to Call in the Experts
DIY deck maintenance can be a rewarding project, but it requires time, proper tools, and a bit of know-how. For routine cleaning and applying stain or sealant, many homeowners find DIY perfectly manageable. However, if your deck requires more extensive repairs, such as replacing boards or fixing structural issues, or if you want a flawless finish, it might be time to call in the experts.
Professional deck maintenance services can provide a high level of care that might be difficult to achieve on your own. They can handle everything from deep cleaning and sanding to applying high-grade stains or sealants that might not be readily available at retail stores. Additionally, professionals can spot potential issues before they become major problems, potentially saving you time and money in the long run.
Regular maintenance is the key to prolonging the life and beauty of your deck. By following these guidelines, you can ensure that your outdoor space remains a welcoming, durable extension of your home. Whether you choose the DIY route or decide to bring in professionals, taking proper care of your deck is an investment that pays dividends in the enjoyment and value of your home.
Troubleshooting Common Issues
When it comes to maintaining the beauty and longevity of your deck, staining is a key component. However, even the most carefully executed deck stain job can encounter issues. Understanding how to address common problems like uneven stain removal and wood discoloration can save you both time and money, while ensuring your deck looks its best. Below, we explore some of these frequent challenges, provide quick fixes, and advise when it might be time to call in a professional.
Uneven Stain Removal
Uneven stain removal is a common frustration that can detract from the appearance of your deck. This usually occurs due to inconsistent sanding, old stain residue, or applying stain on damp wood. Here’s how you can tackle this issue:
1. Preparation is Key: Ensure your deck is thoroughly cleaned and dried before you begin the staining process. Use a quality deck cleaner like those available from Mitre 10, which are specifically formulated to prepare decks for staining.
2. Consistent Sanding: Before applying any stain, sand the deck uniformly. This helps to remove previous layers of stain or sealant and provides a smooth, even surface for the new stain to adhere to.
3. Test Your Stain: Always test your stain on a small, inconspicuous area of the deck to ensure it absorbs evenly and provides the desired color. This step can prevent a lot of headaches later on by catching potential issues early.
4. Apply Stain in Suitable Conditions: Avoid staining in direct sunlight or on overly humid days. Extreme conditions can cause the stain to dry unevenly, leading to blotches and uneven coloration.
Wood Discoloration
Wood discoloration can be caused by a variety of factors, including mold, mildew, and exposure to the elements. Here’s how to address discoloration:
1. Identify the Cause: Determine whether the discoloration is due to external elements like sun exposure or internal issues like mold. This will dictate your approach.
2. Clean Thoroughly: Use a specialized deck cleaning solution to remove any mold, mildew, or old stain. For decks prone to heavy discoloration, consider a product with a mildewcide or other protective additives.
3. Use the Right Stain: Choose a stain that offers UV protection and is suitable for your deck’s wood type. Some stains are specifically designed to enhance the natural color of the wood while protecting against discoloration.
4. Regular Maintenance: Regularly clean your deck and reapply stain as recommended by the product manufacturer to prevent future discoloration.
When to Seek Professional Help
While many staining issues can be resolved with DIY methods, there are times when it’s best to seek professional help:
1. Significant Damage: If your deck shows signs of significant wear, such as deep cracks or rot, professional assessment and repair may be necessary before staining.
2. Persistent Issues: If problems like uneven stain removal or discoloration persist despite your best efforts, a professional might offer new insights or techniques that can help.
3. Complex Projects: If your deck is large or involves intricate design elements, hiring a professional can ensure the job is done right and save you the hassle.
By understanding how to effectively troubleshoot common issues with deck staining, you can maintain your deck’s aesthetics and integrity. Remember, regular maintenance and prompt attention to any issues can keep your deck looking great for years to come.
FAQs: About How To Strip Stain From Deck NZ
What is the best time of year to strip stain from a deck in New Zealand?
The ideal time to strip stain from a deck in New Zealand is during the spring or early autumn when the weather is mild and there’s less likelihood of rain interfering with the process and drying times.
How do I know if my deck needs to be stripped of its old stain?
Signs that your deck needs stripping include peeling, flaking stain, an uneven or dull finish, and wood that no longer repels water effectively. If water soaks into the wood rather than beading up, it’s time to restain.
Can I use a pressure washer to remove the stain from my deck?
Yes, a pressure washer can be used to remove the old stain, especially after applying a chemical stripper. However, it’s important to use the correct pressure settings to avoid damaging the wood. A medium-pressure setting is typically adequate.
What are the best eco-friendly products for stripping deck stain available in New Zealand?
Eco-friendly products for stripping deck stain include those that are biodegradable and contain natural ingredients such as soy or citrus-based solvents. Brands like BioStrip and EcoSolve offer effective options that are less harmful to the environment
How long does it take to strip stain from a deck?
The time it takes to strip stain from a deck varies based on the size of the deck and the type of product used. Generally, the process can take anywhere from a few hours to a full day, including preparation and clean-up time
Do I need to neutralize the deck after stripping the stain? Why?
Yes, neutralizing the deck after stripping is crucial to balance the pH level of the wood and ensure that it is properly prepared for a new coat of stain or sealant. This step prevents the new finish from failing prematurely.
What safety equipment should I use when stripping stain from my deck?
When stripping stain, it’s important to wear protective gear such as gloves, goggles, and a suitable respirator mask to protect against harmful chemicals and dust. Also, wear long sleeves and pants to protect your skin.
How can I dispose of leftover stain stripper and waste materials?
Leftover stain stripper and waste materials should be disposed of according to local council regulations. Contact your local waste management services to find out the proper disposal methods for chemical products.
What should I do if the stain doesn’t come off completely?
If some stain remains after the initial stripping, reapply the stripper to the stubborn areas and allow it to sit for a longer period. Use a stiff brush to scrub these areas before rinsing thoroughly.
Can I apply a new stain immediately after stripping the old one?
It’s recommended to allow the deck to dry completely after stripping and neutralizing before applying a new stain. This typically takes at least 24 to 48 hours, depending on weather conditions.
Conclusion
Concluding our discussion on the importance of maintaining a well-stained deck, it’s essential to recognize how this effort can significantly extend the life and enhance the beauty of your outdoor space. Dedicating just one weekend to this project can yield long-term benefits, saving you money and time on future repairs. A well-applied stain not only protects your deck from weather-related damage but also boosts your home’s overall appeal. So, whether you’re looking to enhance your home’s outdoor aesthetic or protect your investment, taking the time to properly stain your deck is a wise and rewarding endeavor. Encouraged by the potential improvements, homeowners should feel motivated to undertake this project, ensuring their deck remains a cherished part of their home for years to come.
About the Author:
Mike Veail is a recognized digital marketing expert with over 6 years of experience in helping tradespeople and small businesses thrive online. A former quantity surveyor, Mike combines deep industry knowledge with hands-on expertise in SEO and Google Ads. His marketing strategies are tailored to the specific needs of the trades sector, helping businesses increase visibility and generate more leads through proven, ethical methods.
Mike has successfully partnered with numerous companies, establishing a track record of delivering measurable results. His work has been featured across various platforms that showcase his expertise in lead generation and online marketing for the trades sector.
Learn more about Mike's experience and services at https://theleadguy.online or follow him on social media:

